Here are some pics for you visual learners:
1. Number on the back of the 6" x 12"

2. Number on the back of the 3" x 1" little rectangles

3. Lay out of the value mat before laminating.

4. The value mat with the squares glued on then laminated.

5. The tools and pieces needed to assemble the mat.

6. I put the little rectangles where I wanted them then poked the craft knife through both the rectangle and the mat to make little placement holes to mark the exact spot.

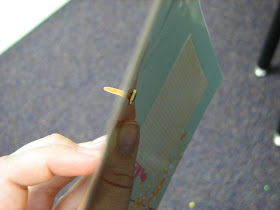
7. I put the fastener through the rectangle.

8. Notice the fastener is in the center of the little rectangle.

9. I then put the fastener through the mat and spread open the prongs to secure the placement of the little rectangle.

10. Here is the mat showing the equal sign.

11. Here is the mat showing the less than sign.

12. Here is the mat showing the greater than sign.

13. Here is the end result.

I also typed up the directions as a document. You can download the directions for FREE on my Teachers Pay Teachers store here. Happy creating!


What a cute idea! Thanks for sharing.
ReplyDeleteHow cool, I love this idea!
ReplyDeleteShawna
The Picture Book Teacher's Edition
Love the scrapbook paper. So cute! Thanks for the shout out!
ReplyDeleteVery clever, thank you for sharing how you did it!
ReplyDelete❤Terri
Monkeying Around With Technology
I love this idea!
ReplyDeleteI am so happy I found your cute blog! I am your newest follower!
Heather
Heather's Heart
I'm lovin' it!
ReplyDeleteThanks for sharing!!! It is an awesome idea!
ReplyDeleteI'm doing this with my second grade kiddos tomorrow! Thanks for helping a student teacher make Math fun! :)
ReplyDeleteA cute idea!!!..good!!
ReplyDelete